
Are you getting used to seeing yourself on a webcam more often lately? As most businesses shifted from the office to working from home, professionals are getting used to using webcams for work-related meetings every day. The webcam experience is paramount for professionals from all spheres.
The importance of actually looking clear, professional and sharp when using a webcam is critical. Since webinars are becoming a more prominent form of communication technology for nearly every industry, many companies are choosing to use webcams to facilitate them. The setup of your webcam can do wonders for the success of your webinar, so why not look your best and give a great impression?
If you are looking to enhance your appearance on a webcam to deliver a high-quality webinar experience, then read on to learn some webcam tips for optimal positioning, lighting and background. This article will also cover specific technical aspects to consider when choosing the right webcam for your webinar.
Webcam Features
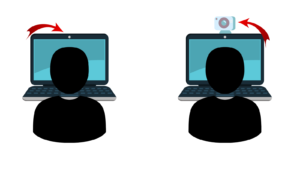
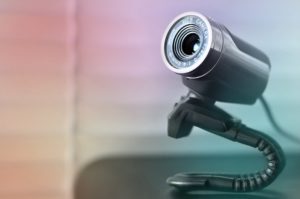
A high-quality webcam is an integral part of the webinar experience. Although laptops and mobile phones do come with built-in cameras nowadays, these tools are often limited and don’t give the viewer the best experience. External webcams deliver high-quality video content. Thus, investing in an external webcam can provide all the necessary features to ensure your webinar content performs well.
Here are some essential webcam tips and features to look for when choosing your ideal webcam and why external cameras are a better option:
- Resolution: The camera resolution is the width and height of the captured image. A higher resolution usually provides a more detailed and sharper image. The ideal embedded webcam (usually within a laptop) these days has at least 720p, but for a good quality webinar, an external webcam with Full-HD 1080p is a must.
- Frame rate: The frame rate is the number of pictures or frames the webcam can capture in a certain number of seconds (frames per second). Most good webcams have a frame rate of 30fps, but getting an even higher frame rate (up to 60fps) means the video will be more seamless. That said, for most applications 30fps will work well for webinars, while 60fps cameras may cause issues if internet bandwidth is limited.
- Sensor size: The sensor image is the “electronic eye” of your webcam, thus the sizing of it determines the image capturing capability of the webcam. Webcams embedded within your laptop usually have around 0.3 megapixels (300,000), but many external digital cameras will have at least 6 megapixels or more, which is why an external webcam’s sensor size is naturally always larger.
- Autofocus: It’s not easy to sit still when conducting a webinar as some people tend to use hand gestures to explain their ideas or move around while they’re presenting. This is why a webcam’s autofocus features hold importance. The autofocus lens should adjust the focus on the subject regardless of whether you move around. Certain webcams with a decent autofocus feature can help in distinguishing the person from walls or other objects in the background as well.
Positioning Tips
The position of your webcam can make a huge difference in terms of how you look during your webinar. The placement of the webcam can distort the way you look; hence, you must be careful with the type of camera angles you use. To look proportionate, the webcam should be slightly above eye level, tilted downwards while you look upwards into the lens.
Laptop Webcam Angles
A common mistake users make is placing their laptops on their laps or on an uneven surface, which showcases an unprofessional angle to anyone facing you in a meeting or webinar. This also means that you will be looking downwards instead of eye level, which is not a great way to present yourself to an audience. Your laptop’s webcam should be placed just above eye level on a flat surface using a laptop extender, stands or even books.
External Webcam Angles
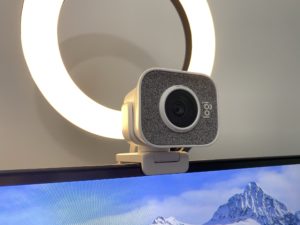
An external webcam is highly recommended in comparison to laptops or phone cameras as the tripod set up can make the positioning process much easier. A tripod or webcam stand is worth the investment as it would give added adjustability to keep your camera steady. Mounting a ring light and webcam to a swivel arm or bendable arm is also a popular way to eliminate any sort of wobbling which causes the camera to lose focus. Any sort of flexible desk mount clamp, bendable or swivel arm stands are usually cheaper and take up less space than a tripod.
Webcam Distance
The distance of the laptop, stand or tripod also matters as it should not be too close to your face. This will make you seem bigger than you really are. However, the further you are from the webcam, the smaller you will appear on screen. The key is to not sit too far or too close to the webcam but to figure out the right distance which makes you look professional. A good rule to remember would be to keep the webcam an arm’s distance away; however, it’s best to try testing the right distance during a webinar test run to get the best-looking angle.
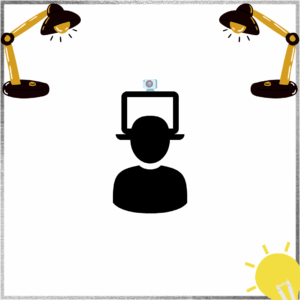
Lighting Tips
Good lighting is essential in order for the audience to clearly see your face without it being a dark or overly bright screen version of you. It’s best to keep your appearance as realistic and professional as possible to improve face-to-face engagement with the webinar attendees.
Backlight
At times natural light from windows might cause the auto-adjustment on your webcam to go down, which can lead to your face looking colorless or dark. When you are sitting with your back to the window and the natural light is coming from behind you, you’ll be backlit. Backlight isn’t good for any digital camera as the sensor might also cause the face to look grainy. Webcams automatically focus on the brighter source of light, and if it comes from backlight then you are no longer the focus of the webcam.
Soft Light Source
Using a soft source of light from the front is a great lighting technique to appear more clear and professional on a webcam. You can face a window with a bright light source coming through and then diffuse the bright light to make it softer. You can also use curtains to break up the light source; however, this would require some testing. Turn your webcam on and face the window’s light source then experiment with the curtains or any object you’ve chosen as a light diffuser to find your ideal lighting.
Ring Light
Due to the pandemic, the world has seen a surge in online meetings and video creation. Time zones are less important when meetings can be attended from anywhere, so virtual events may be scheduled before the sun comes up or after the sun sets in certain regions.
Webinar speakers can’t always depend on bright natural light to look good on camera. Luckily, ring lights are now widely available since setting up meetings and webinars from home has become the new norm. A ring light is a circular light positioned around your camera lens, which provides an even amount of illumination.
You can adjust the ring light to resemble normal daylight hours or to any other setting which is optimal for your webinar. Certain ring lights come with a dimmer or temperature dimmer which allows flexibility in adjusting the light intensity and allows you to pick warm or cool lighting. Keep the ring light at least two feet away from you if you want your image to look clear and crisp.
Lamp Lights
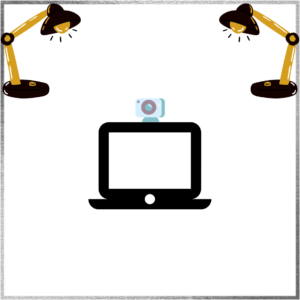
If you’re unable to get a ring light because they’re sold out, or if you’re simply looking to avoid this extra expense for your webinar setup, there is another way. An effective method is to use a lamp positioned right in front of you, in replacement of any special professional lights. The lamp must be positioned behind the webcam and always above it. The lamp lights should be LED daylight balanced or white light as this keeps the correct color temperature. Make sure the main light in your room is also daylight balanced or white light and does not emit any sort of yellow light, which may come from halogen bulbs. If you have more than one lamp you can also use them to your advantage. Below are webcam tips when using other light sources.
Two-point lighting: Use two similar lights and position them behind your webcam. Place one to the right and one to the left side with both angled towards your face.
Three-point lighting: Have the same two-point lighting position described above in place, then add a third light behind you to the side. Keep this light away from the lens of the webcam. The purpose of this third light is to give the subject in front of the webcam more depth and a slight halo effect. This way the subject stands out from the rest of the background.
Background Tips
To prevent the background from diverting attention from your presentation, conduct your webinar in a clean and quiet space. The background of your webinar can be distracting to viewers if there is any unnecessary noise and visual clutter. Some distractions include people walking in the background, noisy home appliances such as the air conditioner or even pets running around. Also, if you are screensharing, it would be best to clear your desktop for a more organized and professional look.
If the background color of the room can have a big impact on the overall webinar experience. Eye-catching wall patterns could divert attention away from yourself at times. Thus, the best approach would be to pick a room with a solid background color.


It is understandable for webinar moderators to not always have access to a professional setup when working from home hence the webcam tips for background imagery can only do so much. If your room choice is limited, ChromaCam is a popular AI-based desktop application which can blur your background. Chromacam also works well with webinars that are produced on the Xtalks webinar platform. Downloading ChromaCam also allows webinar moderators to include PowerPoint slides in the background, which gives the audience a more immersive experience.
Best Webcam Tips
To summarize, here are the key webcam tips for looking professional and clear on a webcam for your next webinar:
Positioning
- Place the webcam slightly above eye level, tilted downwards while you look upwards into the lens
- If using a laptop’s webcam, place it on a flat surface instead of your lap, and use a laptop extender, stand or even books to prop it up to above eye level
- Invest in a tripod, flexible desk mount clamp, bendable or swivel arm stands when using an external webcam for effective positioning
- Keep the webcam at least an arm’s distance away from you
Lighting
- Use a soft source of daylight coming from a window in front of you and don’t use any backlight sources
- Ring lights are a good alternative to natural daylight from windows as they come with added adjustability for light and placement settings
- Lamp lights can be used as a soft light source for webcams. You can place a lamp directly in front of you right behind the webcam. If you have more than one lamp light you can do the following:
- Two-point lighting: When using two lamps, place one to the right of the webcam and one to the left angled directly towards your face
- Three-point lighting: Maintain the two-point lighting setup, then add a third light source right behind you for added depth. This provides a slight halo effect separating you from the background
Background
- Conduct your webinar in a clean and quiet space
- Eliminate distractions such as people walking in the background, noisy home appliances or even pets running around
- If you are screensharing, clear your desktop of scattered files or organize them
- Use a solid background color to keep the attention on yourself rather than on distracting wallpapers
- Download ChromaCam to blur your background
Make sure to do a webinar test run and refer back to all of the webcam tips mentioned above relating to the positioning, lighting and background. These are simple steps which can make a huge difference, so don’t undermine their usefulness in ensuring that you look great on a webcam. Xtalks does a webtest with each webinar speaker before their live webinar which involves testing webcam options and optimizing their setup.
Xtalks is an expert in producing and marketing B2B webinars for the life science, medical device and food industries. If you have any questions about your next webinar marketing initiatives, please contact us for more information.


Join or login to leave a comment
JOIN LOGIN